WELCOME TO SHARING SHIP. Get Our Post Daily to Your Mobile Click Here


Friday, 23 March 2012

NewsWeb Popular Blogger Template

0 comments

NewsWeb Blogger Template

DemoDownload

Template name : NewsWeb

Template type : 1 Sidebar, 2 Column, Adapted from WordPress, Featured Section, Fixed width, Grey, Header Banner, Magazine, Right Sidebar, Slider, Top Navigation Bar, Web 2.0, White, News

Release date : July 8, 2011

Coder/Designer Name(s) : Lasantha Bandara / New WP Themes

Coder/Designer URL(s) : http://www.premiumbloggertemplates.com/

http://newwpthemes.com/

Basic Instructions : How to install a Blogger template

Advanced Details : http://www.premiumbloggertemplates.com/2011/07/newsweb-blogger-template.html

Configure Meta tags

Login to your blogger dashboard--> layout- -> Edit HTML.Now Scroll down to where you see below codes :

<meta content='DESCRIPTION HERE' name='description'/>
<meta content='KEYWORDS HERE' name='keywords'/>


Replace DESCRIPTION HERE,KEYWORDS HERE as below.


DESCRIPTION HERE:Write your blog description

KEYWORDS HERE:Write the keywords of your blog separated by comma.


How To Configure Favicon:


Login to your blogger dashboard--> layout- -> Edit HTML.Now Scroll down to where you see below code :


<link href='YOUR-FAVICON-URL' rel='shortcut icon' type='image/vnd.microsoft.icon'/>


Now replace "YOUR-FAVICON-URL" with your Favicon address/url.


Configure Featured Content Slider:


Login to your blogger dashboard--> layout- -> Edit HTML.Find <!-- Featured Content Slider Started -->.Now scroll down slowly and you can see each featured slider codes between <div class='imageElement'> and </div> .


Now replace,


"This is featured post X title" with your featured post title.

"SLIDER-X-URL-HERE" with your featured post URL.


Slider description with your slider description.


Slider image with your slider image.


for each featured slider.


How To Add a Header Logo


You can add a header logo for this template easily in the "Page Elements" section(Blogger Default Method).Logo image size must be 363px width and 68px height.


If you have any problem regrading this template,leave a comment below.


Important !!!:


Please do not remove the footer credit. I spend several hours to create this blogger template. So that you can use it for your blog. All I ask is, stay the credit intact.


Read more >>
Read More... NewsWeb Popular Blogger Template

Magazine Style Blogger Templates

0 comments

Note:- All templates below are high quality Magazine Style  templates. These templates are highly professional free blogger themes that are customized, stylized and optimized by default. These are the only templates available which are equipped with everything a blog author may want. Just download them and start using them. No effort required on your side!


Newsweb


NewsWeb Blogger Template

DemoDetails


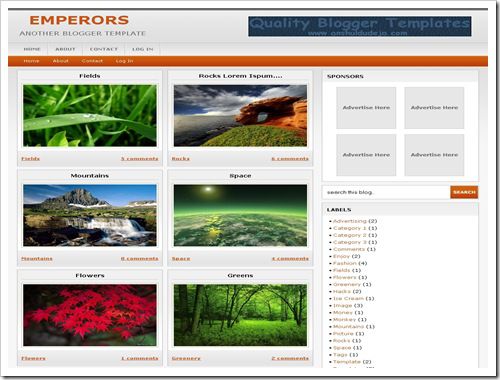
Emperors


EmperorsBloggerTemplate thumb

Demo || Download


Tanzanite


TANZANITE-THREE COLUMN TEMPLATE

 View | Details


Cute Box

CUTE BOX -TWO COLUMN TEMPLATE

 View | Details


( Church Theme )

MBT Church Theme-BLOGGER TEMPLATE

View  |  Details


( Buster Theme Series )


MBT-BUSTER-THEME-1-PURPLE

View  |  Details

MBT-BUSTER-THEME-2--SKYBLUE

 View  |  Details

MBT-BUSTER-THEME-3-GREEN

 View  |  Details

MBT-BUSTER-THEME-4-DEFAULT

 View  |  Details


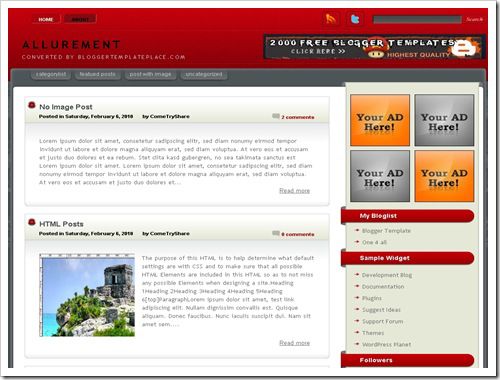
Allurement


AllurementBloggerTemplate thumb

Demo || Download


Read more >>
Read More... Magazine Style Blogger Templates

Tanzanite Template - Three Column Stunning Blogger Template!

0 comments

Happy-New-Year

Tanzanite-Template

Demo | Download

Features

I kept some features secret from Manisha because unique resource is what we always aim for :D Here is a complete list of the features found in Tanzanite Template

  1. Header With Posts Feeds and Comment Feeds
  2. Beautiful Navigation And Sub Navigation
  3. Left and Right Sidebars. With two mini sidebar on right 
  4. Well organized Post Header with separate date, time and label sections
  5. Post body with Attractive BlockQuote
  6. Bullet lists with Image Hover Effect
  7. Author and Reader Comments Different Style
  8. Post Footer With Stunning Social Bookmarking Icons –The Flapper!
  9. Post Footer With Related Post Widget
  10. Posts summarized With Read More link
  11. Customized Blogger Comment Form!
  12. Comment Avatars
  13. Flexible Search Box
  14. Four Column Footer Widget. One Column Can accommodate as many widgets as you can add!
  15. Customized Author Profile With Hover Effect!
  16. Bookmarking Widget For Homepage!
  17. And The List Continues…
Customization

Below I have discussed some important precautionary and customization steps for UsingTanzanite. Click each link for details.

  1. Back Up your current Blogger template
  2. Back Up your Blogger widgets
  3. Upload Tanzanite Template
  4. Edit The Main Navigation Menu
  5. Edit The Sub Navigation Menu

Back Up your current Blogger template

You should save your current blogger template first for safety precautions. To do this follow these steps,

  1. Go To Layout > Edit HTML
  2. Click the link that says “Download Full Template“. As shown in the image below,

backup-Blogger template

    3.    When asked where to save the template, choose a safe location in your hard drive.

    4.    Done!

Back Up your Blogger widgets

To save your current widgets codes, follow these steps,

  1. Go To Layout
  2. Open each widget one by one and copy the code inside it along with the title and paste it in a notepad (not a WordPad)
  3. Save the notepad in a safe location
  4. Done!

Upload Tanzanite Template

After you have downloaded Tanzanite Template, you will then have to replace your current template with it,

  1. Go To Layout > Edit HTML
  2. You will see a box with two buttons at its side that says “ Browse” and “Upload” as shown below,

Upload Blogger Template

    3.    Click the browse button, locate the “Tanzanite Template” file and then click the upload button

    4.    Now you will be asked that certain widget data will be lost if you click save. Since we have already backed up all our widgets so we don’t care. So Click the button that says “Confirm Save”. View your blog to see the new change! :>

Edit The Main Navigation Menu

Main-Navigation-Menu

To edit the Main navigation menu, follow these steps,

  1. Go to Layout > Edit HTML
  2. Search for <div id='navleft'>   (Tip:- Press Ctrl + F )
  3. Just below <div id='navleft'> you will see a long chain of code as shown below,

<div id='navleft'>
      <ul>
<li><a expr:href='data:blog.homepageUrl'>Home</a></li>
<li><a href='#'>Sitemap</a>
<ul>
<li><a href='#'>Sub Page 1</a>
<ul>
<li><a href='#'>Sub Sub Page 1</a></li>
<li><a href='#'>Sub Sub Page 2</a></li>
<li><a href='#'>Sub Sub Page 3</a></li>
</ul>
</li>
<li><a href='#'>Sub Page 2</a></li>
<li><a href='#'>Sub Page 3</a></li>
<li><a href='#'>Sub Page 4</a></li>
</ul>
</li>
<li><a href='#'>Contact</a>
<ul>
<li><a href='#'>Sub Page 1</a></li>
<li><a href='#'>Sub Page 2</a></li>
<li><a href='#'>Sub Page 3</a></li>
<li><a href='#'>Sub Page 4</a></li>
</ul>
</li>
<li><a href='#'>About</a></li>
<li><a href='http://www.mybloggertricks.com'>Download Tanzanite</a></li>
</ul>
</div>

Replace The Hash signs (#) with your page links and bolded black text with your Page titles. If you don’t want the drop down menu then simply delete the blue and red portion. Replacehttp://www.mybloggertricks.com with your own page link.

If you want to add another link then simply paste this code just above </ul>

<li><a href='#'>Your Page Title</a></li>

Edit The Sub Navigation Menu

Sub-Navigation-Menu

To edit the Sub navigation menu, follow these steps,

  1. Go to Layout > Edit HTML
  2. Search for <ul id='subnav'>   (Tip:- Press Ctrl + F )
  3. Just below <ul id='subnav'> you will see the following code,

<ul id='subnav'>
        <li>
          <a href='#'>Quick Tour</a>
           </li>
        <li>
          <a href='#'>Other Webs</a>
        </li>
<li>
          <a href='#'>About</a>
        </li>
        <li>
          <a href='#'>Contact</a>
        </li>
   </ul>
    </div>

Replace The Hash signs (#) with your page links/URL and bolded black text with your Page titles. To add another link simply paste this code just above </ul>

<li><a href='#'>Your Page Title</a></li>

Read more >>
Read More... Tanzanite Template - Three Column Stunning Blogger Template!

“The Cute Box” - Speedy Yet Professional!

0 comments

CUTE-BOX-DISPLAY-PICI was on EID holidays and during these three days a part from spending some time with my family and friends I spent a portion of my time in designing a really cute and speedy “two column” Blogger template. I named it “Cute Box”. It is unbelievably fast loading, well optimized, monetization friendly, has an attractive magazine style look and is surely cute!

Let’s not waste any time and have a look at it, (The Screenshot may be different from actual demo)

Cute-Box

View | Download

Features

Lets look at some of its Main features,

  1. Spitted Header
  2. Two Column
  3. Well organized Post Heading with separate date, time and label sections
  4. Wide Post body with Stylized BlockQuote
  5. Bullet lists with Image Hover Effect
  6. Post Footer With Seductive Social Bookmarking Icons –The Flapper!
  7. Post Footer With Related Post Widget
  8. Posts summarized With Read More link
  9. Embedded and stylized Comment section. Author and Readers comment with different style
  10. Wide Open Comment Form!
  11. Comment Avatars
  12. Flexible Search Box
  13. Unique Subscription Form
  14. Best Advertisement sections
  15. Four Column Footer Widget. One Column Can accommodate as many widgets as you can add!
  16. Stylized Author Profile
  17. Bookmarking Widget For Homepage
  18. And So on…

The bolded features are those that are found in 1/10,000 blogger templates found in the blogosphere. I am not kidding!

Customization

Below are important precautionary and customization steps for Cute Box . Click each link for details.

  1. Back Up your current Blogger template
  2. Back Up your Blogger widgets
  3. Upload Cute Box
  4. Edit The Navigation Menu
  5. Add The Subscription Email Form
  6. Author Profile
  7. Add The Bookmarking Widget

Back Up your current Blogger template

You will have to save your current blogger template for safety precaution. To do this follow the steps below,

  1. Go To Layout > Edit HTML

  2. Click the link that says “Download Full Template“. As shown in the image below,

backup-template1

    3.    When asked where to save the template, choose a safe location in your hard drive.

    4.    Done!

Back Up your Blogger widgets

To save your current widgets follow the steps below,

  1. Go To Layout

  2. Open each widget one by one and copy the code inside it along with the title and paste it in a notepad (not a WordPad)

  3. Save the notepad in a safe location

  4. Done!

Upload Cute Box Template

Once you have downloaded Cute Box then follow the steps below to replace your current template with it,

  1. Go To Layout > Edit HTML

  2. You will see a box with two buttons at its side that says “ Browse” and “Upload” as shown below,

backup-template

    3.    Click the browse button, locate the “Cute Box” file and then click the upload button

    4.    Now you will be asked that certain widget data will be lost if you click save. Since we have already backed up all our widgets so we don’t care. Go on and click the “Confirm Save” button. View your blog to see the good change!

Edit The Navigation Menu

navigation-menu

To edit the navigation menu, follow the steps below,

  1. Go to Layout > Edit HTML

  2. Search for <div id='navleft'> using the browser search box     (Tip:- Press Ctrl + F )

  3. Just below <div id='navleft'> you will see a long chain of code as shown below,

<div id='navleft'>
      <ul>
<li><a expr:href='data:blog.homepageUrl'>Home</a></li>
<li><a href='#'>Cute Box</a>
<ul>
<li><a href='#'>Sub Page 1</a></li>
<li><a href='#'>Sub Page 2</a></li>
<li><a href='#'>Sub Page 3</a></li>
</ul>
</li>
<li><a href='#'>Contact</a>
<ul>
<li><a href='#'>Sub Page 1</a></li>
<li><a href='#'>Sub Page 2</a></li>
<li><a href='#'>Sub Page 3</a></li>
<li><a href='#'>Sub Page 4</a></li>
</ul>
</li>
<li><a href='#'>About</a></li>
<li><a href='http://www.mybloggertricks.com'>Download Cute Box</a></li>
</ul>

</div>

Replace The Hash signs (#) with your page links and bolded green text with your Page titles. If you don’t want the drop down menu then simple delete the red portion. Replacehttp://www.mybloggertricks.com with your own page link.

If you want to add another link then simple paste this code just above </ul>

<li><a href='#'>Your Page Title</a></li>

Add The Subscription Email Form

subscription-form

To add the subscription email form do the following,

  • Go To Blogger > layout
  • Click the edit link next to Subscribe
  • Paste the code below inside it,

<style>
.emailform {
padding:0px; margin: 0px 10px 0px 0; float: left; width:100px; height:77px; border:0;
}
input.mbt1 {
color:#fff;
font: bold 10px "ms sans serif",Arial, sans-serif;
background:#41C952;
border:0;
padding:3px;
}
input.mbt1hov {
background:#F39100;
}
</style>

<a href="http://feeds2.feedburner.com/TntByStc" rel="alternate" title="Subscribe using a Feed Reader" type="application/rss+xml"><img src="https://blogger.googleusercontent.com/img/b/R29vZ2xl/AVvXsEjG3f0qRhWDdonlnfzpNCrZkjespkcwE3v8DuPct-y_wxP9zLiZ_AZZF8loPjGZ9B0WnQoclzGlP9Yb0FqTgp_C1Zcf9ZRNdEpTzk34-KedX80beBOBB_T3-2JjYKpJoPS2UWeXEeuAd0EA/s400/Email+Orange_128.png" class="emailform"/></a><p><a href="http://feeds2.feedburner.com/TntByStc"rel="alternate" title="Subscribe to my feed" type="application/rss+xml">Receive Updates </a><span style="color: #383838;">By Submitting your email address below:</span></p>

<form action="http://feedburner.google.com/fb/a/mailverify" style="padding: 5px; " target="popupwindow" method="post" onsubmit="window.open('http://feedburner.google.com/fb/a/mailverify?uri=TntByStc', 'popupwindow', 'scrollbars=yes,width=550,height=520');return true"><input style=" color:#289728; background: #fff; border:1px dotted #289728; width: 90px;" name="email" type="text"/><input value="TntByStc" name="uri" type="hidden"/><input value="en_US" name="loc" type="hidden"/> <input onmouseover="this.className='mbt1 mbt1hov'" onmouseout="this.className='mbt1'" value="Enter" class="mbt1" type="submit"/></form>

Add Author Profile

author-profile

To write a new bio for your self or to delete this widget, do the following,

  • Go To  layout
  • Click the edit link next to About Me
  • And make the necessary changes that you like to make

Add The Bookmarking Widget

bookmarking-widget

I will write a comprehensive post on how to add this very important widget.

Read more >>
Read More... “The Cute Box” - Speedy Yet Professional!

“MBT Church Theme”. Wordpress Converted Blogger Template Free worth $300

0 comments

MBT Church Theme

This template is different and unparallel in every aspect as compared to any other Blogger template found in the blogosphere. Its not just a Wordpress template converted to blogger but it is a precious blog template which is highly Stylized,Customized and Optimized by default!

See it for yourselves,

MBT-church-theme-Demo Demo  |  Download

Downloads: 1135

This is how the Church Theme originally looked when converted to blogger.

uncustomized-church-theme-dDemo

Amazed to see the difference, aren’t you? Lets look at some important features that makesMBT Church Theme the only template with “extensive customization”.

Features related to Customization

Some Important features and built-in widgets are highlighted in the image below,

  1. Blogger Navigation Bar invisible by Default (1)
  2. Coloured title (2)
  3. Curtain Style Header (3)
  4. RSS Feed Widget/Subscription Email Form Widget, with a customized email form and button (4) (Not Built-in)
  5. Built-in Pop up image effect (5)
  6. Built-in Fading image effect (6)
  7. Beautiful Social Bookmarking Icons (7)
  8. Related Post Widget (8)
  9. Adsense adds appear in sub-pages only for fast Page-load-time (9)
  10. Built-in Comment counter! (10)
  11. Author comments appear in different style (11)
  12. Different Sidebar Web Bullet (12)
  13. Page Navigation! (13)
  14. Highly stylized Three Column Footer Widget – The most important edition to the template (14)
  15. Blinking Back To Top Link (15)
  16. 3D style Sidebar Top Area (16)
  17. 3D style Sub Navigation Bar (16)
  18. Built-in Read More  or Continue Reading Link visible on homepage

MBT-church-theme-Display

Layout Screen Shot

Here is a screenshot of the layout, where you can see extra “add a gadget” widgets above header, post-body and footer.

MBT-church-theme-layout

Optimization Guide

MBT Church Theme is a well scripted and optimized BlogSpot template. I have done whatever I could to let search engines better crawl your blog content and let your blog rank higher in search results.

By default I have added some very important meta tags under the <head> tag. Meta tags help search engines to better know what your blog is all about. These meta tags need some edition. To edit them follow the steps below,

Go To Layout > Edit HTML

And search for <head> (Press Ctrl + F to use a search box for finding <head>)

You will find 4 important meta tags under the <head> tag as shown in the image below,

Meta-Tags-For-MBT-Church-Th

You just need to edit the Meta tags as guided in the bolded text below.

Update:- I have observed that for some unknown reasons the meta tags get automatically deleted. If you see no metas in your buster theme than simple copy paste the code below just under <b:include data='blog' name='all-head-content'/>

<link href='mailto:Your Email Address Goes Here' rev='made'/>
<b:if cond='data:blog.url == data:blog.homepageUrl'>
<meta content='Add your blog description here. Maximum Characters (including spaces) should be 120' name='Description'/></b:if>
<meta content='Add your keywords here, Maximum Characters (including spaces) should be 200' name='keywords'/>
<meta content='Write your name here' name='Author'/>

A meta Description can be a simple sentence that defines the overall topic of your blog.

A meta keywords tag is supposed to be a brief and concise list of the most important terms on your page

I am giving a dummy example below for my blog to help you get an idea

<link href='mailto:mustafa.xyz@hotmail.com' rev='made'/>
<b:if cond='data:blog.url == data:blog.homepageUrl'>
<meta content=’Get dozens of tricks related to blogger hosted blogs with free download of highly professional blogger templates' name='Description'/></b:if>
<meta content='Blogger widgets,templates, download, free, seo tips, blogspot tricks' name='keywords'/>
<meta content='Mohammad Mustafa Ahmedzai' name='Author'/>

Avoid duplicate meta keywords/ repetitive keywords. For instance, for meta keywords I have written 'Blogger widgets,templates, download, free, seo tips, blogspot tricks

and not  ‘Blogger widgets, Blogger templates, download Blogger templates, free Bloggertemplates, Blogger seo tips, Blogger tricks’

You can observe that the word Blogger is used 6 times and templates 3 times. Please avoid repetition of a single keyword. You don’t need to worry about the arrangement of your keywords because search engines are clever enough to create good combination of words by themselves out of the keywords you have provided.

Customization Guide

NAVIGATION-MENU

To customize the Navigation Menu, do the following,

To edit the Main navigation menu, follow the steps below,

  1. Go to Layout > Edit HTML

  2. Search for <div id='NavbarMenu'> using the browser search box     (Tip:- Press Ctrl + F )

  3. Just below <div id='NavbarMenu'> you will see a long chain of code as shown below,

<div id='NavbarMenuleft'>
      <ul id='nav'>
        <li><a expr:href='data:blog.homepageUrl'>Home</a></li>
        <li>
          <a href='#'>Sitemap</a>
<ul>
            <li>
              <a href='#'>Sub Page #1</a>

       <ul>
                <li><a href='#'>Sub Sub Page #1</a></li>
                <li><a href='#'>Sub Sub Page #2</a></li>
                <li><a href='#'>Sub Sub Page #3</a></li>
              </ul>
            </li>
            <li><a href='#'>Sub Page #2</a></li>
            <li><a href='#'>Sub Page #3</a></li>
            <li><a href='#'>Sub Page #4</a></li>
            <li><a href='#'>Sub Page #5</a></li>
          </ul>
        </li>
        <li><a href='#'>About Me</a></li>
        <li><a href='#'>Contact Me</a></li>
      </ul>
    </div>

Edit the bolded text in the code above with your own Page links and Page Titles. Replace the hash sign (#) with your Page URLs/Links and bolded black text with your Page Titles

If you don’t want sub pages then simply delete this part of the code

<ul>
            <li>
              <a href='#'>Sub Page #1</a>

       <ul>
                <li><a href='#'>Sub Sub Page #1</a></li>
                <li><a href='#'>Sub Sub Page #2</a></li>
                <li><a href='#'>Sub Sub Page #3</a></li>
              </ul>
            </li>
            <li><a href='#'>Sub Page #2</a></li>
            <li><a href='#'>Sub Page #3</a></li>
            <li><a href='#'>Sub Page #4</a></li>
            <li><a href='#'>Sub Page #5</a></li>
          </ul>

To edit the Sub navigation menu, follow the steps below,

  1. Go to Layout > Edit HTML

  2. Search for <div id='subnavbar'> using the browser search box     (Tip:- Press Ctrl + F )

  3. Just below <div id='subnavbar'> you will see a long chain of code as shown below,

<ul id='subnav'>
       <li>
         <a href='http://www.mybloggertricks.com/2009/08/releasing-amazing-mbt-church-theme.html'>Download This Theme</a>
         <ul>
           <li>
             <a href='http://www.mybloggertricks.com/2009/08/releasing-amazing-mbt-church-theme.html'>My Blogger Tricks</a>
<ul>
               <li>
                 <a href='#'>Sub Sub Page #1</a>
               </li>
               <li>
                 <a href='#'>Sub Sub Page #2</a>
               </li>
               <li>
                 <a href='#'>Sub Sub Page #3</a>
               </li>
             </ul>

   </li>
           <li>
             <a href='#'>Sub Page #2</a>
           </li>
           <li>
             <a href='#'>Sub Page #3</a>
           </li>
         </ul>
       </li>
       <li>
         <a href='http://www.mybloggertricks.com'>Template Gallery</a>
       </li>
       <li>
         <a href='http://www.mybloggertricks.com'>Blogger Tricks</a>
       </li>
     </ul>

Again replace the hash sign (#) with your Page Links and Bolded Green Text with your Page Titles. Also Replace http://www.mybloggertricks.com/2009/08/releasing-amazing-mbt-church-theme.html    and   http://www.mybloggertricks.com with your own Page Links

If you don’t want sub pages delete this part of the code,

<ul>
               <li>
                 <a href='#'>Sub Sub Page #1</a>
               </li>
               <li>
                 <a href='#'>Sub Sub Page #2</a>
               </li>
               <li>
                 <a href='#'>Sub Sub Page #3</a>
               </li>
             </ul>

   </li>
           <li>
             <a href='#'>Sub Page #2</a>
           </li>
           <li>
             <a href='#'>Sub Page #3</a>
           </li>
         </ul>

Read more >>
Read More... “MBT Church Theme”. Wordpress Converted Blogger Template Free worth $300

“MBT Buster Theme Series”. Highly Stylized, Customized and Optimzed by Default! Free To Download.

0 comments

Have a glance of them by clicking the link below each theme,

MBT Buster Theme Series

mbt-church-theme1

mbt-church-theme2

View | Download

mbt-church-theme3

View | Download

mbt-church-theme4

View | Download                                                                                                  View | Download

There are many new features in these MBT template series which will be of great interest to even Amanda herself. And as I say always MBT templates are stylized, customized andoptimized by default! There is absolutely no work required on your side but a little push start at first :>

Lets look at some of its Main features,

  1. Navigation bar
  2. Well organized Post Header with separate date, time and label sections
  3. Wide post body with Stylized Post images and BlockQuote
  4. Post Footer With- MBT Social Bookmarking Icons
  5. Post Footer With- Subscription Block
  6. Post Footer With- Built-in Related Post Widget
  7. Sidebars with rounded header corners
  8. Stylized and un-stylized Sidebar Sections for multiple use
  9. Flexible Search Box
  10. Flexible Subscription Form
  11. Flexible Advertisement section
  12. Cross Browser Compatible Multi Tab Widget – Highly User Friendly!
  13. Embedded and stylized Comment section. Author and Readers comment with different style
  14. Comment Count
  15. Comment Avatar, with Comment Icon for anonymous users
  16. Footer Three Column Widget. One Column Can accommodate as many widgets as you can add!

IMPORTANT WIDGET SECTIONS IN LAYOUT

As shown in the image below, there a total of 4 widget sections in right sidebar. Widget Section 2 and 4 are stylized sections whilst section 1 and 3 are un-stylized. Add only those widgets to section 1 and 3, for which you want a completely unique customization. To know what I mean by that read the Customization Instructions

BLOGGER LAYOUT WIDGET SECTIONS

Now you need to Boost up your selected template with Three Important Professional Procedures. Which are,

  1. Customization

  2. Optimization

  3. Monetization

Customization

Below are important steps to upload and customize your MBT Buster Theme. I have also shared codes to flexible widgets used in the template. Click each link for details.

  1. Back Up your current Blogger template
  2. Back Up your Blogger widgets
  3. Upload MBT Buster Theme
  4. Edit The Navigation Menu
  5. Add The Search Box
  6. Add The Subscription Form
  7. Add The Advertisement Section
  8. Add The Multi Tab Widget
  9. Create The Header Background Image

Back Up your current Blogger template

You will have to save your current template for future use. To do this follow the steps below,

  1. Go To Layout > Edit HTML

  2. Click the link that says “Download Full Template“. As shown in the image below,

backup-template1

    3.    When asked where to save the template, choose a safe location in your hard drive.

You are done!

Back Up your Blogger widgets

To save your current widgets follow the steps below,

  1. Go To Layout

  2. Open each widget one by one and copy the code inside it along with the title and paste it in a notepad (not a WordPad)

  3. Save the notepad in a safe location

You are done!

Upload MBT Buster Theme

Once you have downloaded MBT Buster theme then follow the steps below to replace your current template with it,

  1. Go To Layout > Edit HTML

  2. You will see a box with two buttons at its side that says “ Browse” and “Upload” as shown below,

backup-template

    3.    Click the browse button, locate the buster theme file and then click the upload button

    4.    Now you will be asked that certain widget data will be lost if you click save. Since we have already backed up all our widgets so we don’t care. Go on and click the “Confirm Save” button. Alas! you have successfully replaced your current template. View your blog to see the new mega change.

Edit The Navigation Menu

Navigation-menu

To edit the navigation menu, follow the steps below,

  1. Go to Layout > Edit HTML

  2. Search for <div id='subnavbar'> using the browser search box     (Tip:- Press Ctrl + F )

  3. Just below <div id='subnavbar'> you will see a long chain of code as shown below,

<ul id='subnav'>
        <li>
          <a href='#'>Home</a>
        </li>
        <li>
          <a href='#'>About</a>
        </li>
        <li>
          <a href='#'>Contact</a>
        </li>
  <li>
          <a href='#'>Sitemap</a>
        </li>
  <li>
          <a href='http://www.mybloggertricks.com'>Download This Theme</a>
        </li>
</ul>

    4.    Edit the bolded text in the code above with your own Page links and Page Titles.Replace the hash sign (#) with your Page URL and bolded green text with your Page Name/Title. Also Replace http://www.mybloggertricks.com with your own Page URL

5. If you want to add another link/tab but have no option left than paste the code below just above </ul>

         <li>
          <a href='#'>Page Name</a>
        </li>

    6.    Save your template and view your template to see the changes in action.

you are done!

Add The Search Box

To add the search box you will have to follow the steps below,

  1. Go To layout

  2. Click Add a Gadget from the widget section-3 and choose HTML/JavaScript

  3. Paste the code below inside the HTML/JavaScript widget,

<div id="search">
<form id="searchform" action="/search" style="display:inline;" method="get">
<input id="s" onfocus="if (this.value == &quot;Looking For Something..?&quot;) {this.value = &quot;&quot;}" value="Looking For Something..?" name="q" onblur="if (this.value == &quot;&quot;) {this.value = &quot;Looking For Something..?&quot;;}" type="text"/>
<input onmouseover="this.className='mbt mbthov'" onmouseout="this.className='mbt'" class="mbt" value="GO >>" type="submit"/>
</form>
</div>

    5.    Click save and view your template to see the change.

you are done!

Add The Subscription Form

Adding this widget needs a bit comprehensive instructions so I will soon publish a separate post on it.

Add The Advertisement Section

Follow the steps below,

  1. Go To layout

  2. Click Add a Gadget from the Widget Section-3, and choose HTML/JavaScript


Add The Multi Tab Widget

To add this beautiful widget, follow the steps below,

  1. Go To layout

  2. Click Add a Gadget from the Widget Section-3, and choose HTML/JavaScript

  3. Paste the code below, inside the HTML/JavaScript widget

<form action="tabtampil.html" method="get">
    <div id="TabTampil" class="TabTampil">
    <div style="width: 350px;" class="TTs"> <a>TAB 1</a> <a>TAB 2</a> <a>TAB 3</a></div>
    <div style="width: 350px; height: 270px;" class="Halamans">
    <div class="Halaman">
    <div class="Alas">
    <br/>

TAB 1 CONTENT GOES HERE

    </div>
    </div>
    <div class="Halaman">
    <div class="Alas">
    <br/>

TAB 2 CONTENT GOES HERE

    </div>
    </div>
    <div class="Halaman">
    <div class="Alas">
    <br/>

TAB 3 CONTENT GOES HERE

    </div>
    </div>
    </div>
    </div>
    </form>
<script type="text/javascript">tabtampil_inisial('TabTampil');</script>

Replace Tab 1, 2, 3 With Tab Titles and TAB 1,2,3 CONTENT GOES HERE  with the HTML code of your Recent Comments, Posts and Popular Posts Widgets. You can add anything in Tab Content Area.

I worked really hard to make this widget user friendly. You will find this widget code really handy. Further I have also solved the Browser compatibility Issue i.e The tabs will look rounded in Firefox, Safari, Opera, Chrome and they will only look rectangular in IE. IE was a real headache for me!

Create The Header Background Image

You will have to create a Header image in gif format and with dimensions 1024 by 214. After you have created one, upload it to your template as follows,

  1. Go To layout

  2. Then click the Edit link at the top of your layout as shown below,

buster-theme-layout

    3.   A window will open. Click the Browse button and locate your header image. Make sure you check the box saying “Instead of Title and Description

    4.    Hit save and you are done!

Optimization

As I said all MBT Templates are optimized by default! Hence you do not need to find meta tags and add them inside your templates. You only need to add the required keywords, description and your name to the metas. Follow the steps below,

  1. Go To Layout > Edit HTML
  2. And search for <head> (Tip:- Press Ctrl + F to use a search box for finding <head>)
  3. You will find 4 important meta tags under the <head> tag as shown in the image below,

You just need to edit the required fields as guided in the bolded text below.

Update:- I have observed that for some unknown reasons the meta tags get automatically deleted. If you see no metas in your buster theme than simple copy paste the code below just under <b:include data='blog' name='all-head-content'/>

<link href='mailto:Your Email Address Goes Here' rev='made'/>
<b:if cond='data:blog.url == data:blog.homepageUrl'>
<meta content='Add your blog description here. Maximum Characters (including spaces) should be 120' name='Description'/></b:if>
<meta content='Add your keywords here, Maximum Characters (including spaces) should be 200' name='keywords'/>
<meta content='Write your name here' name='Author'/>

Once done, hit Save. You have now successfully optimized your Buster Theme by allowing search engines to crawl your template smoothly.

For Details on how to choose good keywords and how to write effective keywords and description, read  the Optimization Guide for MBT Church Theme

Monetization

For adding Adsense code below posts, you will need to follow the steps below,

  1. Get Your Adsense Code From www.adsense.com Make sure to select a horizontal banner or horizontally aligned 5 links.
  2. Convert Your Adsense Code into an embeddable one by using the MBT Tool
  3. Now Go To your Layout > Edit HTML
  4. Check The Expand Widgets Box
  5. And search for <div class='adsense'> You will see something like the code below,

<div class='adsense'>
<center><b>YOUR ADSENSE CODE GOES HERE</b></center>
</div>

    6.    Replace the bolded black text with your Adsense code and hit save. You are Done!

 
Read more >>
Read More... “MBT Buster Theme Series”. Highly Stylized, Customized and Optimzed by Default! Free To Download.

Contact Us

0 comments
Read more >>
Read More... Contact Us

Get 1000$ Worth Money Making Ebooks

0 comments
Download 10 Magazine Templates For Free Worth 500$ From us. Subscribe to us using the below subscribe box. in 1.04.2012 Ten Email will be selected and Templates will be send to their email Address.

Enter your email address:

Delivered by FeedBurner

Read more >>
Read More... Get 1000$ Worth Money Making Ebooks

Table Of Contents

0 comments


Read more >>
Read More... Table Of Contents

Templates

0 comments

Template
  1. BIZMAX - New !!
Read more >>
Read More... Templates

Tips - Tricks

0 comments
Read More... Tips - Tricks

SUPPORT US

Followers


About The Author

Categories

My Blogger Pedia. Copyright 2008 All Rights Reserved | Contact | about

/*featured start*/ /*featured start*/