WELCOME TO SHARING SHIP. Get Our Post Daily to Your Mobile Click Here


Wednesday, 1 August 2012

NEW FACEBOOK POPOUT LIKEBOX VERSION 2 FOR BLOGGER- All Direction Available..

0 comments
New Facebook Popout Likebox Version 2 for Blogger

Hi, Here is the New Updated Facebook Popout Likebox Gadget of Version 2 for Blogger. This is Updated Release Comes with Highly Customizable options. Many of Readers asking How change the position from right to left, Width and Height. With this Updated version you can customize those options as well as Background Colors and Facebook Badge Color also.

LIVE PREVIEW

Click here for Live Demo
HOW TO INSTALL FACEBOOK POPOUT LIKEBOX VERSION 2 ?
First you need to have a jQuery Plugin in your Blog template.
This Step is Required, If your Blog already have this plugin then Ignore this Step.
If your Blog Don’t have this Plugin, Install the jQuery Plugin.
Add the below line of code before </head> tag.

<script src="https://ajax.googleapis.com/ajax/libs/jquery/
1.7.1/jquery.min.js"></script>


  1. Click the Widget Generator Button


  2. Customize the Settings as you need


  3. Click on Generate button and add widget to your Blog


WIDGET GENERATOR


Read more >>
Read More... NEW FACEBOOK POPOUT LIKEBOX VERSION 2 FOR BLOGGER- All Direction Available..

Tuesday, 22 May 2012

HEXADECIMAL COLOR CHART

0 comments
#FFFFFF #FFFFCC #FFFF99 #FFFF66 #FFFF33 #FFFF00
#FFCCFF #FFCCCC #FFCC99 #FFCC66 #FFCC33 #FFCC00
#FF99FF #FF99CC #FF9999 #FF9966 #FF9933 #FF9900
#FF66FF #FF66CC #FF6699 #FF6666 #FF6633 #FF6600
#FF33FF #FF33CC #FF3399 #FF3366 #FF3333 #FF3300
#FF00FF #FF00CC #FF0099 #FF0066 #FF0033 #FF0000

#CCFFFF #CCFFCC #CCFF99 #CCFF66 #CCFF33 #CCFF00
#CCCCFF #CCCCCC #CCCC99 #CCCC66 #CCCC33 #CCCC00
#CC99FF #CC99CC #CC9999 #CC9966 #CC9933 #CC9900
#CC66FF #CC66CC #CC6699 #CC6666 #CC6633 #CC6600
#CC33FF #CC33CC #CC3399 #CC3366 #CC3333 #CC3300
#CC00FF #CC00CC #CC0099 #CC0066 #CC0033 #CC0000
 
#99FFFF #99FFCC #99FF99 #99FF66 #99FF33 #99FF00
#99CCFF #99CCCC #99CC99 #99CC66 #99CC33 #99CC00
#9999FF #9999CC #999999 #999966 #999933 #999900
#9966FF #9966CC #996699 #996666 #999933 #999900
#9933FF #9933CC #993399 #993366 #993333 #993300
#9900FF #9900CC #990099 #990066 #990033 #990000

#66FFFF #66FFCC #66FF99 #66FF66 #66FF33 #66FF00
#66CCFF #66CCCC #66CC99 #66CC66 #66CC33 #66CC00
#6699FF #6699CC #669999 #669966 #669933 #669900
#6666FF #6666CC #666699 #666666 #666633 #666600
#6633FF #6633CC #663399 #663366 #663333 #663300
#6600FF #6600CC #660099 #660066 #660033 #660000

#33FFFF #33FFCC #33FF99 #33FF66 #33FF33 #33FF00
#33CCFF #33CCCC #33CC99 #33CC66 #33CC33 #33CC00
#3399FF #3399CC #339999 #339966 #339933 #339900
#3366FF #3366CC #336699 #336666 #336633 #336600
#3333FF #3333CC #333399 #333366 #333333 #333300
#3300FF #3300CC #330099 #330066 #330033 #330000

#00FFFF #00FFCC #00FF99 #00FF66 #00FF33 #00FF00
#00CCFF #00CCCC #00CC99 #00CC66 #00CC33 #00CC00
#0099FF #0099CC #009999 #009966 #009933 #009900
#0066FF #0066CC #006699 #006666 #006633 #006600
#0033FF #0033CC #003399 #003366 #003333 #003300
#0000FF #0000CC #000099 #000066 #000033 #000000
Read more >>
Read More... HEXADECIMAL COLOR CHART

Thursday, 10 May 2012

Add Facebook Comments Box To Blogger Blogs - New!

1 comments

Facebook Comment Box Style For Blogger From Mybloggertricks.com

facebook-comments-boxIn 2009 Facebook developers introduced their best social plugin called "Facebook Comments Box". This plugin can be embedded in any website or blog and visitors can use their IDs of Facebook, Yahoo, AOL or Hotmail to leave a comment at your site. This plugin did show a lot of problems when it was embedded in Blogger Blogs in initial days of its development but now thanks to our fellow friend Max from Allblogtools this plugin has been finally bloggerized to work just perfect with any Blogger hosted blogs. I have edited Max's coding in some areas and have mentioned some more interesting options that will help you use the Facebook comments box in parallel to your old Blogger Comment form so that you may loose no previous comments and provide users with multiple options of commenting from different platforms.

Live Demo

This is how the Facebook Comments box looks like,

LIGHT SCHEME

facebook-commentS-box LIGHT

DARK SCHEME

Facebook-comments-dark-scheme
Interesting? Lets now learn how to embed this extremely useful comment form in Blogspot blogs. Kindly follow the simple steps below,

1- Get a Facebook Application ID
  1. Go To Facebook Developers Page
  2. Submit your blog URL and give it a name. Keep Site name as your "Blog Title" and Site URL as your "blog address"
site-url
     3.   Hit "create app" button and proceed
     4.   After submitting the security check code you will see this page,
app-id
       5.   Save that App ID in a notepad because we will need that latter. Now Click the link near the top-right corner of the same page that says "Developer Dashboard"
image
      6.  One the new window that appears click the Edit Settings link ,
edit-settings
        7.  Then go to Website option and write your Site Domain as blogspot
website
       8.  Save Changes and jump to the next step of this tutorial
2- Adding the Facebook comments Box to Blogger
Now its time to do embed the comments box in your blog templates. So follow these easy steps,
PS: Please make sure your blogger comment form is embedded below posts. For doing this first go to Blogger > Settings > comments > and then choose embed comments below posts. After doing this follow the tutorial below.
  1. Go To Blogger > Design > Edit HTML
  2. Backup your template
  3. Check the "Expand Widget Templates" box
  4. Search for <html and just after it give a space and add this code,
xmlns:fb='http://www.facebook.com/2008/fbml'


  5.  Next search for 


<body>


Note: In New Blogger Designed templates the same code looks like this,


<body expr:class='&quot;loading&quot; + data:blog.mobileClass'>


Find any one of these codes and just after it paste the code given below,


<div id='fb-root'/>

<script>


    window.fbAsyncInit = function() {


    FB.init({


      appId  : &#39;YOUR_APP_ID&#39;,


      status : true, // check login status


        cookie : true, // enable cookies to allow the server to access the   session


      xfbml  : true  // parse XFBML


    });


  };


    (function() {


    var e = document.createElement(&#39;script&#39;);


      e.src = document.location.protocol +   &#39;//connect.facebook.net/en_US/all.js&#39;;


    e.async = true;


      document.getElementById(&#39;fb-root&#39;).appendChild(e);


    }());


</script>


  • Replace YOUR_APP_ID with your Facebook application ID that you saved in a notepad.

     6.    Next search for  </head> and just above it paste the following code,

<meta expr:content='data:blog.pageTitle' property='og:title'/>

<meta expr:content='data:blog.url' property='og:url'/>


<meta content='MY Blogger Tricks' property='og:site_name'/>


<meta content='BLOG-LOGO-IMAGE-LINK' property='og:image'/>


<meta content='YOUR_APP_ID ' property='fb:app_id'/>


<meta content='http://www.facebook.com/mybloggertricks' property='fb:admins'/>


<meta content='article' property='og:type'/>


Make these changes:


  • Replace MY Blogger Tricks with your blog title/Name.


  • Replace BLOG-LOGO-IMAGE-LINK with the image link of your logo. Your logo will look good if it is in gif format and having this size ->  40px by 40px . This logo will appear next to your post title on Facebook profiles of your visitors like this,


logo


  • Replace YOUR_APP_ID  with the your Facebook Application ID that you saved in notepad


  • Replace http://www.facebook.com/mybloggertricks with your Facebook user profile link

     7.    Now Search for this,

<b:includable id='comment-form' var='post'>
     8.    Just after it paste the code given below,

<b:if cond='data:blog.pageType == &quot;item&quot;'>

<div style='padding:0px 0px 0px 0px; margin:0px 0px 0px 0px;'><script src='http://connect.facebook.net/en_US/all.js#xfbml=1'/>


<div> <fb:comments  colorscheme='light' expr:href='data:post.url' expr:title='data:post.title' expr:xid='data:post.id' width='520'/></div>


<div style='color:#fff; background-color:#3B5998;border: solid 1px #ddd; font-size:10px; padding:3px; width:510px;'>Facebook Blogger Plugin: Bloggerized by <b><a alt='blogger templates' href='http://www.allblogtools.com/' style='text-decoration:underline; color:#fff;' target='_blank' title='blogger templates'>AllBlogTools.com</a></b> Enhanced by <b><a alt='blogger widgets' href='http://www.mybloggertricks.com/' style='text-decoration:underline; color:#fff;' target='_blank' title='Blogger Widgets'>MyBloggerTricks.com</a></b></div></div>


</b:if>


  • If you want to use the dark scheme then simply replace light with dark


  • To change the Comments box size, change this value width='520'


  • To change the footer credits size, change this value width:510px


  • Keep a difference of 10 pixels between the box size and footer size. For example if you set box-size to width='600' then set footer-size to width:590px


9. Save your template and Bingo you are Done!


Read more >>
Read More... Add Facebook Comments Box To Blogger Blogs - New!

Saturday, 31 March 2012

Backlinks Checker Tool

0 comments
Your domain:


Powered by iWEBTOOL

Read more >>
Read More... Backlinks Checker Tool

HTML Parser Tool

0 comments
Read more >>
Read More... HTML Parser Tool

Color Picker

0 comments
Read more >>
Read More... Color Picker

Moving Down Background for Blogger Widget

0 comments

Now, I will share about Moving Down Background for Blogger. This trick is very unique. Why? Because the blog background will move without scrolling. So I called this "Unique Background". Want to see the DEMO? OK, now if you want to try Moving Down

Background for Blogger, just follow the steps below.

1. Log in to your blogger account
2. Go to Design --> Edit HTML
3. Copy the code below, and paste above </head>

<script src='http://ajax.googleapis.com/ajax/libs/jquery/1.3.2/jquery.min.js?ver=1.3.2' type='text/javascript'></script>
<script type='text/javascript'>
//<![CDATA[
$(function(){
// ***
// Scrolling background
// ***
// height of background image in pixels
var backgroundheight = 4000;
// get the current minute/hour of the day
var now = new Date();
var hour = now.getHours();
var minute = now.getMinutes();
// work out how far through the day we are as a percentage - e.g. 6pm = 75%
var hourpercent = hour / 24 * 100;
var minutepercent = minute / 30 / 24 * 100;
var percentofday = Math.round(hourpercent + minutepercent);
// calculate which pixel row to start graphic from based on how far through the day we are
var offset = backgroundheight / 100 * percentofday;
// graphic starts at approx 6am, so adjust offset by 1/4
var offset = offset - (backgroundheight / 1);
function scrollbackground() {
// decrease the offset by 1, or if its less than 1 increase it by the background height minus 1
offset = (offset < 1) ? offset + (backgroundheight - 1) : offset - 1;
// apply the background position
$('body').css("background-position", "50% " + offset + "px");
// call self to continue animation
setTimeout(function() {
scrollbackground();
}, 70
);
}
// Start the animation
scrollbackground();
});
//]]>
</script>

4. Then try to find

body {

just copy this code and put under body {

background:url(http://lh6.ggpht.com/_dfnTVAxeWMI/SrFV2ZgHUvI/AAAAAAAACU8
/yP_7acjnv5U/bgscroll.jpg);

5. Click SAVE TEMPLATE

Read more >>
Read More... Moving Down Background for Blogger Widget

Meteor Shower on My Blog!!! Amazing Blogger widget

0 comments

Now, we will try to make an effect. That's Meteor Shower on My Blog. This effect is very interesting. When you open your blog (has added this effect) you blog will be get meteor shower. Very nice right? OK, now if you want to add meteor shower on your blog, just follow the steps below. Want to see the DEMO?


1. Log in to your blogger account
2. Go to Design --> Page Elements --> Add Gadget
3. Choose "HTML/Java Script"
4. Then, add the code below

<script language="javascript">
nd_mode="meteor";
nd_sound="on";
nd_vAlign="bottom";
nd_hAlign="right";
nd_vMargin="10";
nd_hMargin="10";
nd_target="_top";
</script>
<script language="javascript" src="http://www.netdisaster.com/js/mynd.js">
</script>

5. Click SAVE

Read more >>
Read More... Meteor Shower on My Blog!!! Amazing Blogger widget

Add Zoom Hover Effect to Image to blogger

0 comments

1. Log in to your blogger account
2. Go to Design --> Edit HTML
3. Copy the code below, and paste above ]]></b:skin>

.hovergallery img{
-webkit-transform:scale(0.8);
-moz-transform:scale(0.8);
-o-transform:scale(0.8);
-webkit-transition-duration: 0.5s;
-moz-transition-duration: 0.5s;
-o-transition-duration: 0.5s;
opacity: 0.7;
margin: 0 10px 5px 0;
}
.hovergallery img:hover{
-webkit-transform:scale(1.1);
-moz-transform:scale(1.1);
-o-transform:scale(1.1);
opacity: 1;
}

4. Then if you want to active the effect, use this code

<a class="hovergallery" href="http://full-tricks.blogspot.com/" target="_blank">
<img src="http://1.bp.blogspot.com/-ycrEcnVzJAs/TcXGWwcjL3I/AAAAAAAAAYQ/MiQNmK44ZOg/s200/fullblogtricks-blogger-icon.jpg" /></a>

=> Replace the blue code with your link
=> Replace the red code with image URL
5. Finish... Hopefully useful.

Read more >>
Read More... Add Zoom Hover Effect to Image to blogger

Add Floating Spoiler Menu Jquery Image

0 comments

Hi, guys! Now, we will try to add floating spoiler menu. This spoiler menu is difference with others. We don't need to click the button to display the menu. Just put your cursor on this menu, and the menu wil be slide out. Want to see the DEMO? Now, if you wanna add floating spoiler menu into your blog, just follow the steps below.
1. Log in to your blogger account
2. Go to Design --> Page Elements --> Add Gadget
3. Chose "HTML/Java Script"
4. Add the code below

<style text-type="CSS">
#bmenu{
position:fixed;
right:5px;
center:0px;
background-color:#000;
border-radius:10px;
-moz-border-radius:10px;
border:1px solid #FFF;
width:202px;
height:20px;
color:#FF0606;
transition:all .5s ease-in;-moz-transition:all .5s ease-in;-webkit-transition:all .5s ease-in;-o-transition:all .5s ease-in;z-index:3;overflow:hidden;padding:9px 15px 10px;}
#bmenu h3{
margin:0;
padding:0;
text-align:center;
cursor:pointer;}
#bmenu ul{
border-radius:10px;-moz-border-radius:10px;
border:2px solid #FFf;
background-color:#FF0606;
margin:15px 0;
padding:0 15px;}
#bmenu li{list-style:none;margin:0 0 5px;padding:0;} #bmenu li a{
color:#000;
text-decoration:none;
font-size:14px;}
#bmenu li a:hover{
color:#fff;}
#bmenu:hover{
z-index:5;
height:175px;
</style>
<div id="bmenu">
<h3>
TITLE</h3>
<ul>
<li><a href="#">FBT-1</a></li>
<li><a href="#">FBT-2</a></li>
<li><a href="#">FBT-3</a></li>
<li><a href="#">FBT-4</a></li>
<li><a href="#">FBT-5</a></li>
</ul>
</div>

Customize:
=> The position of floating spoiler menu
=> The title of this menu
=> The title and link location
5. Click SAVE

Read more >>
Read More... Add Floating Spoiler Menu Jquery Image

Social Sharing Pearl Type Widget Below Every Post

0 comments

social sharing widget

A great and amazing widget that catches the eye of a lot of people this widget is created by to start blogging and its given to our loyal readers so I hope that you all like it. From tostartblogging.com

How To Add This Widget?

As its great we will go on the steps directly so I hope that you all like it.

1- Choose design then go to edit html.

2- Click on expand widget templates.

3- Search for

]]></b:skin>

4- Paste this code above it.

.Fadein img {
filter:alpha(opacity=100);
-moz-opacity: 1.0;
opacity: 1.0;
border:0;
}
.Fadein:hover img {
filter:alpha(opacity=30);
-moz-opacity: 0.30;
opacity: 0.30;
border:0;
}

5- Search for:

<data:post.body/>

6- Just after it paste this code   Note: if you have added the read more then after the read more code paste it.

<b:if cond='data:blog.pageType == &quot;item&quot;'>
<center><span style='color: #7AA1C3; font-size: 12px; font-family: Verdana;'><b>If You Enjoyed This Post Please Take 5 Seconds To Share It.</b></span><br/>
<!-- Twitter -->
<a class='Fadein' expr:href='&quot;http://twitthis.com/twit?url=&quot; + data:post.url + &quot;&amp;title=&quot; + data:post.title' rel='external nofollow' target='_blank'><img alt='Twitter' height='70px' src='http://i1111.photobucket.com/albums/h472/ahmedronaldo/TWITTER.png' width='70px'/></a>
<!--DIGG-->
<a class='Fadein' expr:href='&quot;http://digg.com/submit?phase=2&amp;url=&quot;  + data:post.url' rel='external nofollow' target='_blank'><img alt='Digg This' height='90px' src='http://i1111.photobucket.com/albums/h472/ahmedronaldo/DIGG.png' width='90px'/></a>
<!--Stumble-->
<a class='Fadein' expr:href='&quot;http://www.stumbleupon.com/submit?url=&quot; + data:post.url + &quot;&amp;title=&quot; + data:post.title' rel='external nofollow' target='_blank'><img alt='Stumble' height='100px' src='http://i1111.photobucket.com/albums/h472/ahmedronaldo/STUMBLE.png' width='100px'/></a> 
<!--Facebook-->
<a class='Fadein' expr:href='&quot;http://www.facebook.com/sharer.php?u=&quot; + data:post.url + &quot;&amp;t=&quot; + data:post.title' rel='external nofollow' target='_blank'><img alt='Facebook' height='90px' src='http://i1111.photobucket.com/albums/h472/ahmedronaldo/FACEBOOK.png ' width='90px'/></a>
<a class='Fadein' expr:href='&quot;http://technorati.com/faves?add=&quot; + data:post.url' rel='external nofollow' target='_blank'><img alt='Technorati' height='70px' src='http://i1111.photobucket.com/albums/h472/ahmedronaldo/Technorati.png ' width='70px'/></a>
</center><a href="http://www.tostartblogging.com/2012/03/top-social-sharing-plugins-all-in-one.html" style="float:right;font-size:10px;">Top Social Sharing Plugins</a>
<a href="http://www.tostartblogging.com/" target="_blank" style="float:right;font-size:10px;padding:0 4px 0 0">To Start Blogging</a>

</b:if>

Removing our credits will let your site be closed because its against law so please leave the credits.

Now you are done and congratulations for this new look for your site and for the amount of traffic you will get.

Last Words:

I hope you like it please share this post with all your friends and peace : )

Read more >>
Read More... Social Sharing Pearl Type Widget Below Every Post

Saturday, 24 March 2012

Wordpress Vs Blogger Which is Best

0 comments

Wordpress-or-Blogger--confused?Are you confused with which blogging platform to choose to start your blogging career? The major blogging hosting platforms are no doubt Blogger and WordPress. Now to judge which one is better I have written a detailed comparison chart below that will be of great help in making a smart decision.

Note:- I am not an employee of either Blogger or WordPress. The below chart is solely my personal research.

WordPress VS Blogger Comparison Chart 2010. ©

FEATURES

BLOGGER

WORDPRESS

WHO WON?

Template Customization

Offers Free Layout/Style Sheet Customization

No style sheet customization. Payment required

Blogger

Tutorials/Help

Innumerable Tutorials on Blogger Tricks

Hardly some

Blogger

Number of un-official Themes

Innumerable Designers Creating Free Templates each day

Few Designers Involved 
in offering free templates

Blogger

Coding Used

Uses user friendly scripting and coding i.e HTML, XML, CSS

Uses advance scripting like php that few can understand

Blogger

Dashboard Interface

Highly user friendly. Easy to navigate.

Complicated Interface with hectic navigation

Blogger

Default Template Collection

Limited Collection Of Default templates mostly un-professional

Over 70+ high quality Templates

WordPress

Template/Theme 
Replacement

Default Template can be replaced by a more free professional template

No template change allowed

Blogger

Widgets

Innumerable Official and Un official Widgets available

Limited Official widgets available. Rarely few un- official gadgets available.

Blogger

Comments

No commenting editing. Moderation allowed. No Spam protection. No user friendly comment form

Comments can be edited and moderated. Spam protection available. User friendly comment form

WordPress

SEO, Optimization

Though Owned by Google, no favoritism. Manual optimization is required

Owned by a private party. Meta Tags Plugins used. Easy To optimize

Both

Blog Privacy

You can limit access to your blog to 100 Authors and 100 readers. All must be Google account holders.

You can limit access to your blog to 35 Wordpress account holders. Posts can be password protected or Private.

Blogger

Comment restriction

You can restrict comments to Google account holders, Open ID users or Any one (includes Anonymous)

Comments can not be restricted. Anyone can comment

Blogger

Blog Import

Only from one BlogSpot blog to another

A Blog can be imported from another WordPress blog or from Blogger, Yahoo! 360, LiveJournal and Movable Type and TypePad

WordPress

Posts and Comment Notification

Authors and subscribers can be notified of latest posts and comments via Email

Same here

Both

Comment Verification

Asks users to verify if they are humans using a 4-6 digit code

Does not asks for any verification. 
More spam effected

Blogger

Video Storage Limit

Unlimited with Google Video and an upload limit of 16GB

Just 3GB. More space on upgrade.

Blogger

Image storage limit

1 Gigabyte With Picasa Web Albums

3 Gigabytes. More space can be gained through upgrade. 
You can also upload.ppt, .doc, .odt and .pdffiles

WordPress

File type Storage

Only allows image uploading

Allows upload of files like .ppt, pdf .doc and .odt files. 
More file types can be uploaded on upgrading.

WordPress

Blog Stats

Does not have any default stats system. But allows third party tracking scripts.

Has a default visitor stats system that shows statistics for two days only and does not provide detailed stats reports. 
Does not allow third party tracking scripts.

Blogger

Blog co-partners

100 Google account holders can be added as Administrators or Authors

35 WordPress account holders can be added as Administrators, Editors, Authors or Contributors.

Blogger

Advertisements

Displays no advertisement of its own on your blog.

Displays discreet AdSense advertisements on your blog for small percentage of the page views

Blogger

Posts By Email

Has a Mail-to-Blogger feature which turns any email account into a blog-posting application

Posts can be published using emails

Both

Post Feed On Mobile Phones

Supported

Not Supported

Blogger


Read more >>
Read More... Wordpress Vs Blogger Which is Best

how to create a blogger account

0 comments

Step 1: Sign Up to Create a Blog at Blogger.com

Blogger.com Home Page

Visit the Blogger.com home page and select the "Create Your Blog Now" button to begin the process to start your new Blogger.com blog.

Step 2: Create a Google Account

Create Google Account© Google

If you don't already have a Google account, you'll need to create one by completing the form on this page.

Step 3: Sign In with Your Google Account

Google Account Sign In© Google

If you already have a Google account, you can bypass the "Create Google Account" step and simply sign in with your existing Google account username and password.

Step 4: Name Your New Blog

Name New Blogger.com Blog© Google

Enter the blog name and corresponding domain name (to precede '.blogspot.com') in the spaces provided.

Step 5: Choose a Template

Choose a Blogger.com Template© Google

Select a standard template for your new blog.

Step 6: Congratulations - Your New Blog is Active!

Blogger.com Blog Created© Google

Your blog is now live and ready for you to start writing content.

Step 7: Write Your First Post

Write a Post in a Blogger.com Blog© Google

That's all there is to it! You're now ready to write your first blog post in your new Blogger.com

Read more >>
Read More... how to create a blogger account

Friday, 23 March 2012

NewsWeb Popular Blogger Template

0 comments

NewsWeb Blogger Template

DemoDownload

Template name : NewsWeb

Template type : 1 Sidebar, 2 Column, Adapted from WordPress, Featured Section, Fixed width, Grey, Header Banner, Magazine, Right Sidebar, Slider, Top Navigation Bar, Web 2.0, White, News

Release date : July 8, 2011

Coder/Designer Name(s) : Lasantha Bandara / New WP Themes

Coder/Designer URL(s) : http://www.premiumbloggertemplates.com/

http://newwpthemes.com/

Basic Instructions : How to install a Blogger template

Advanced Details : http://www.premiumbloggertemplates.com/2011/07/newsweb-blogger-template.html

Configure Meta tags

Login to your blogger dashboard--> layout- -> Edit HTML.Now Scroll down to where you see below codes :

<meta content='DESCRIPTION HERE' name='description'/>
<meta content='KEYWORDS HERE' name='keywords'/>


Replace DESCRIPTION HERE,KEYWORDS HERE as below.


DESCRIPTION HERE:Write your blog description

KEYWORDS HERE:Write the keywords of your blog separated by comma.


How To Configure Favicon:


Login to your blogger dashboard--> layout- -> Edit HTML.Now Scroll down to where you see below code :


<link href='YOUR-FAVICON-URL' rel='shortcut icon' type='image/vnd.microsoft.icon'/>


Now replace "YOUR-FAVICON-URL" with your Favicon address/url.


Configure Featured Content Slider:


Login to your blogger dashboard--> layout- -> Edit HTML.Find <!-- Featured Content Slider Started -->.Now scroll down slowly and you can see each featured slider codes between <div class='imageElement'> and </div> .


Now replace,


"This is featured post X title" with your featured post title.

"SLIDER-X-URL-HERE" with your featured post URL.


Slider description with your slider description.


Slider image with your slider image.


for each featured slider.


How To Add a Header Logo


You can add a header logo for this template easily in the "Page Elements" section(Blogger Default Method).Logo image size must be 363px width and 68px height.


If you have any problem regrading this template,leave a comment below.


Important !!!:


Please do not remove the footer credit. I spend several hours to create this blogger template. So that you can use it for your blog. All I ask is, stay the credit intact.


Read more >>
Read More... NewsWeb Popular Blogger Template

Magazine Style Blogger Templates

0 comments

Note:- All templates below are high quality Magazine Style  templates. These templates are highly professional free blogger themes that are customized, stylized and optimized by default. These are the only templates available which are equipped with everything a blog author may want. Just download them and start using them. No effort required on your side!


Newsweb


NewsWeb Blogger Template

DemoDetails


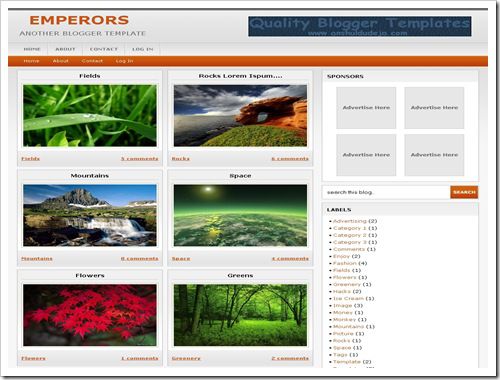
Emperors


EmperorsBloggerTemplate thumb

Demo || Download


Tanzanite


TANZANITE-THREE COLUMN TEMPLATE

 View | Details


Cute Box

CUTE BOX -TWO COLUMN TEMPLATE

 View | Details


( Church Theme )

MBT Church Theme-BLOGGER TEMPLATE

View  |  Details


( Buster Theme Series )


MBT-BUSTER-THEME-1-PURPLE

View  |  Details

MBT-BUSTER-THEME-2--SKYBLUE

 View  |  Details

MBT-BUSTER-THEME-3-GREEN

 View  |  Details

MBT-BUSTER-THEME-4-DEFAULT

 View  |  Details


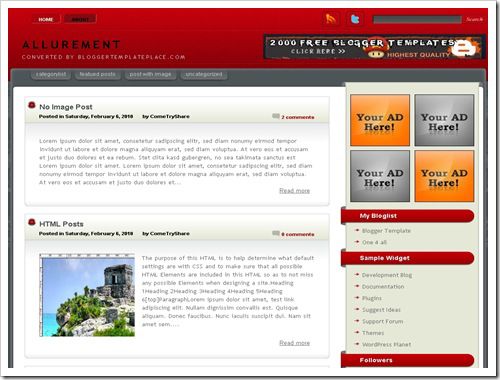
Allurement


AllurementBloggerTemplate thumb

Demo || Download


Read more >>
Read More... Magazine Style Blogger Templates

SUPPORT US

Followers


About The Author

Categories

My Blogger Pedia. Copyright 2008 All Rights Reserved | Contact | about

/*featured start*/ /*featured start*/